What is a Robotic Arm?
A robotic arm is a particular kind of mechanical arm that can be programmed and perform tasks comparable to a human arm. It can be a standalone robot or a component of a more sophisticated robot. Such a manipulator has joints that allow for either translational (linear) displacement or rotational motion, similar to an articulated robot. A kinematic chain may be thought of as being formed by the manipulator's linkages. The end effector, which is identical to the human hand, is the culmination of the manipulator's kinematic chain. However, the phrase "robotic hand" is frequently used as a synonym for the robotic arm.
Types of Robotic Arm
- Articulated arm
- Six-axis
- Collaborative robot
- SARA
- Cartesian
- Cylindrical
- Spherical/Polar
- Parallel/Delta
- Anthropomorphic
Today in this article I will be explaining how to make a four-axis robotic arm using Arduino,serv motor and potentiometer let's get started
Note:- To make the Robotic Arm you will know some basic knowledge of Arduino with servomotor also Arduino with Potentiometer
To learn Arduino with servomotor

 July 15, 2022
Contents [ hide ] For controlling servo motors, the Servo Library is a fantastic library. Two straigh…
To know about Arduino with Potentiometer

 July 15, 2022
Contents [ hide ] Potentiometer readings are printed to the Arduino Serial Monitor. In these demons…
Also, know about servo motor control with potentiometer

Servo Motor Control Using Potentiometer
 July 16, 2022
Contents [ hide ] For controlling servo motors, the Servo Library is a fantastic library. Two straightforward examples th...
Components Required
| Item Image | Item Name | Quantity | Shop Online |
|---|---|---|---|
| Arduino UNO | 1 No | ||
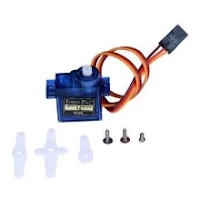
| Servo Motor | 4 No | ||
| potentiometer | 4 No | ||
| 5-volt adapter | 1 No | ||
| DC power jack | 1 No | ||
| Jumper wires | Enough |
Circuit Diagram
Arduino Code
        #include <Servo.h>
   Servo myservo1; // create servo object to control a servo
   Servo myservo2; // create servo object to control a servo
   Servo myservo3; // create servo object to control a servo
   Servo myservo4; // create servo object to control a servo
   int potpin1 = A0; // analog pin used to connect the potentiometer
   int potpin2 = A1; // analog pin used to connect the potentiometer
   int potpin3 = A2; // analog pin used to connect the potentiometer
   int potpin4 = A3; // analog pin used to connect the potentiometer
   int val1; // variable to read the value from the analog pin
   int val2; // variable to read the value from the analog pin
   int val3; // variable to read the value from the analog pin
   int val4; // variable to read the value from the analog pin

void setup() {
   myservo1.attach(8); // attaches the servo on pin 8 to the servo object
   myservo2.attach(9); // attaches the servo on pin 9 to the servo object
   myservo3.attach(10);// attaches the servo on pin 10 to the servo object
   myservo4.attach(11); // attaches the servo on pin 11 to the servo object
}

void loop() {
   val1 = analogRead(potpin1);
   // reads the value of the potentiometer (value between 0 and 1023)
   val1 = map(val1, 0, 1023, 0, 180);
   // scale it to use it with the servo (value between 0 and 180)
   myservo1.write(val1); // sets the servo position according to the scaled value
   delay(15);

   val2 = analogRead(potpin2);
   // reads the value of the potentiometer (value between 0 and 1023)
   val2 = map(val2, 0, 1023, 0, 180);
   // scale it to use it with the servo (value between 0 and 180)
   myservo2.write(val2); // sets the servo position according to the scaled value
   delay(15);

   val3 = analogRead(potpin3);
   // reads the value of the potentiometer (value between 0 and 1023)
   val3 = map(val3, 0, 1023, 0, 180);
   // scale it to use it with the servo (value between 0 and 180)
   myservo3.write(val3); // sets the servo position according to the scaled value
   delay(15);

   val4 = analogRead(potpin4);
   // reads the value of the potentiometer (value between 0 and 1023)
   val4 = map(val4, 0, 1023, 0, 180);
   // scale it to use it with the servo (value between 0 and 180)
   myservo4.write(val4); // sets the servo position according to the scaled value
   delay(15);

}


